Machine to machine authentication
Machine to machine authentication uses OAuth 2.0 Client Credentials Grant flow with API Keys used as credentials. The API Keys are credentials bound to a specific user, company and client application. An API Key is valid as long as the user is valid in the company, or until the user or a company admin revokes the API Key using Procountor UI. Machine to machine authentication is the only authentication method available for users with "API login only" user right limitation enabled.
Creating an API Key using Procountor UI
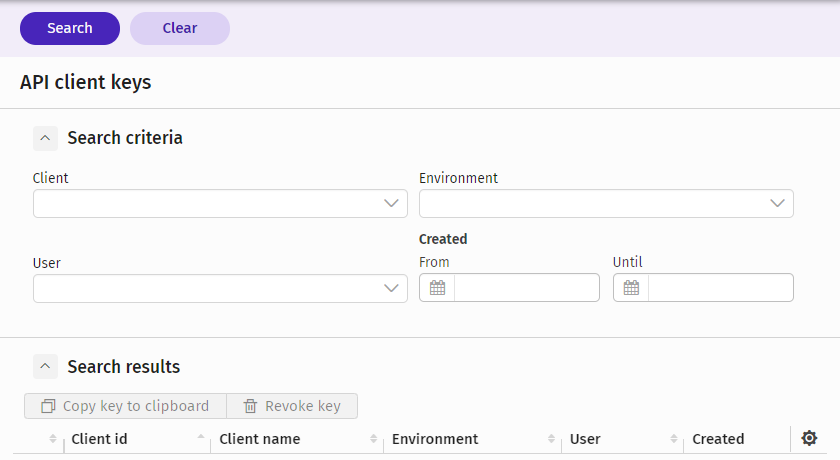
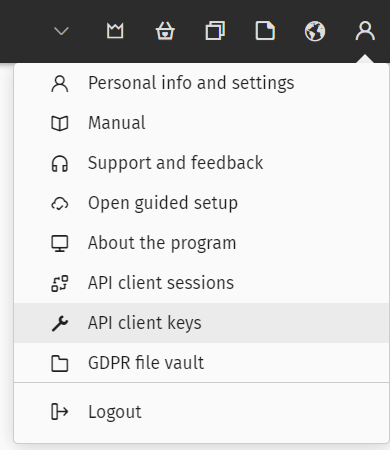
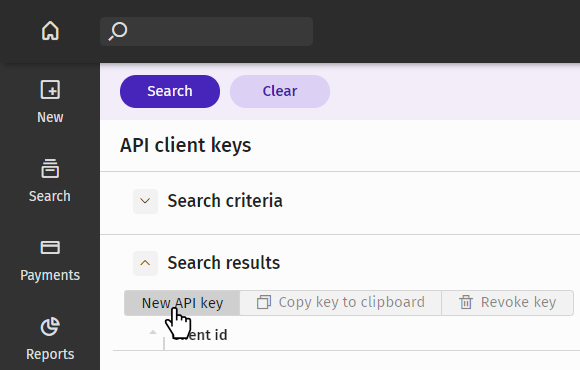
Easiest way to create an API Key is to use the Procountor UI. The user needs to log in to the Procountor UI and then navigate to the API client keys page using the top right Basics menu. On this page the user can find "New API key" button, which opens a dialog for creating a new API key.
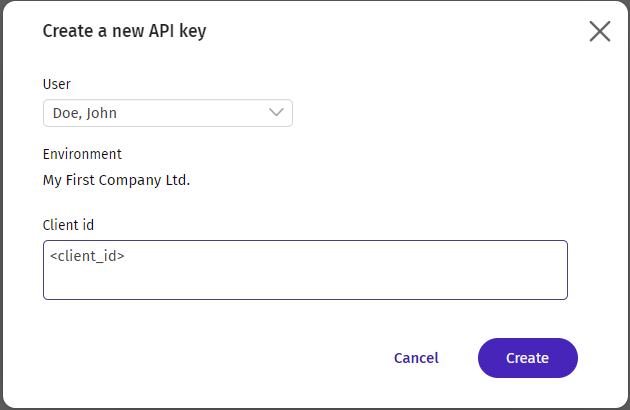
The user then needs to copy the client id of your application to the client id field in the dialog and click create. This will create a new, integration specific key, display it to the user, and allow copying it to the clipboard. The user should then copy this key and provide it for your integration.
An organizational admin is able to create a key for any valid user in their organization. This makes it possible to create a technical API user account, which is allowed to use the API, but is not allowed to log in to the regular UI.
Creating an API Key using the API
To create an API Key for a user without the need to navigate through the Procountor UI you need to have the user log in on the API Key login page. This is a one time action done in a similar manner than Authorization Code Grant flow. The first step is to obtain an authorization code, which is then swapped for an API Key.
Avoid sending sensitive information (password, API client secret, API key, refresh token, authorization code) in the request URL [OWASP guidelines].
Step 1: Obtaining authorization code
Direct user to API Key login page
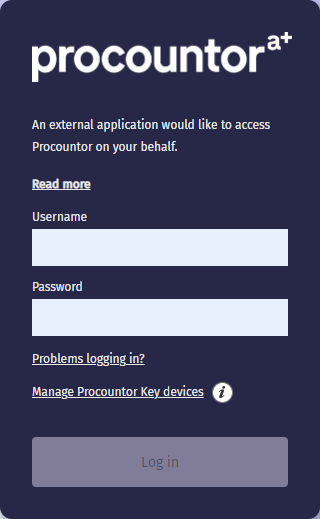
To obtain the authorization code the user needs to be directed to Procountor API Key login page:
GET https://api.procountor.com/keylogin?response_type=code&client_id=<client_id>&redirect_uri=<redirect_uri>&state=<state> HTTP/1.1
The client_id and redirect_uri parameters given in the URL are integration specific and given to you when you request a testing environment. The state parameter is optional, implementation specific, and will be returned with the authorization code. All parameters need to be URL encoded.
User performs login
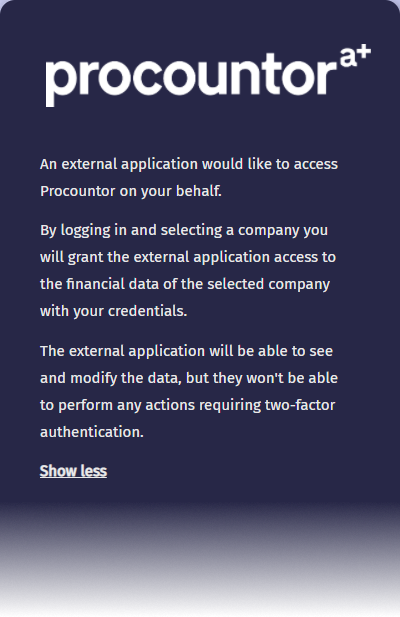
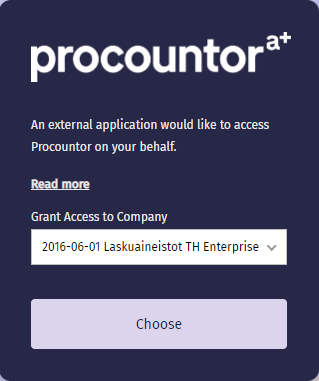
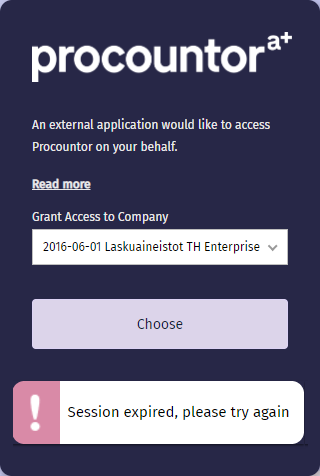
The user is shown a login dialog, where they need to enter their username and password in order to log in. This page also shows a disclaimer to the user telling that they're granting an external application an access to Procountor. After entering correct credentials the user is directed to another dialog, where they must select a company they want to authorize access to. The login flow must be completed within a 5 minute period. The login page functionality requires enabling cookies and JavaScript.
User is forwarded to redirect URI
After succesful login the user is forwarded to the integration specific redirect URI:
HTTP/1.1 302 Found
Location: <redirect_uri>?code=<authorization_code>&state=<state>&expires_in=300
The value of the state parameter matches the value given to the login page and can be used e.g. for matching purposes. The code parameter is the authorization code which will be used in the next step. This is a single use code valid for five minutes. Note that the same redirect_uri is used also for Authentication Code Grant flow so if you are offering both authentication flows your application needs to differentiate them using the state parameter.
Step 2: Trading code for API Key
Next the authorization code obtained above needs to be exchanged for an API Key. This is done by sending a POST request our OAuth key endpoint from your application with the following application/x-www-form-urlencoded data:
POST https://api.procountor.com/api/oauth/key HTTP/1.1
Content-Type: application/x-www-form-urlencoded

grant_type=authorization_code&
client_id=<client_id>&
client_secret=<client_secret>&
redirect_uri=<redirect_uri>&
code=<authorization_code>
The client_id, client_secret, and redirect_uri parameters are integration specific and given to you when you request a testing environment. The code parameter is the single use authorization code from the previous step. As a response to this request you will receive a JSON document with the API Key:
HTTP/1.1 200 OK
Content-Type: application/json

{
  "api_key": "eyJ0eXAiOiJKV1QiLCJhbGciOiJIUzI1NiJ9.eyJpc3MiOiJodHRwczovL2FwaS10ZXN0LnByb2NvdW50b3IuY29tIiwiYXVkIjoiY2xpZW50X2lkIiwic3ViIjoyNjUzNSwiY2lkIjoxNDE1OSwiaWF0IjoxNjA3OTYyNDgwLCJqdGkiOiI3ZDQ0NDg0MC05ZGMwLTExZDEtYjI0NS01ZmZkY2U3NGZhZDIifQ.PZegXEcIDzJcOqlJEK-KKkvoQ0TgACABtZjaWQEvzOU"
}
The API Key can then be used in Client Credentials flow to get an access token to call the API with. You should save the API Key in a secure location within your application.
Client Credentials Grant Flow
To authenticate to Procountor API using an API Key happens using the OAuth 2.0 Client Credentials flow and the OAuth token endpoint. This authentication method will give you an access token, which can be used to make API calls for one hour period. After the access token expires a new token needs to be fetched using the same method.
Authenticate with API Key to get an access token
Before using any of the API endpoints the API key needs to be exchanged for an access token. This is done by sending a POST request our OAuth token endpoint from your application with the following application/x-www-form-urlencoded data:
POST https://api.procountor.com/api/oauth/token HTTP/1.1
Content-Type: application/x-www-form-urlencoded

grant_type=client_credentials&
client_id=<client_id>&
client_secret=<client_secret>&
redirect_uri=<redirect_uri>&
api_key=<api_key>
The client_id, client_secret, and redirect_uri parameters are integration specific and given to you when you request a testing environment. The api_key parameter is the user and company specific API Key you can obtain by following the steps above. As a response to this request you will receive a JSON document with an access token:
HTTP/1.1 200 OK
Content-Type: application/json

{
  "access_token": "eyJhbGciOiJIUzI1NiIsInR5cCI6IkpXVCJ9.eyJpc3MiOiJodHRwczovL2FwaS10ZXN0LnByb2NvdW50b3IuY29tIiwiYXVkIjoiY2xpZW50X2lkIiwic3ViIjoyNjUzNSwiY2lkIjoxNDE1OSwianRpIjoiN2Q0NDQ4NDAtOWRjMC0xMWQxLWIyNDUtNWZmZGNlNzRmYWQyIiwiYXV0aF90aW1lIjoxNjA3OTYyNDc5LCJpYXQiOjE2MDc5NjI0ODAsImV4cCI6MTYwNzk2NjA4MCwic2NvcGUiOiJtMm0ifQ.D8FNTcN8RzHP30rtv1cJ5Elsk9lYQ-NIS0cDyWB4hmg",
  "expires_in": 3600
}
The access token is valid for one hour after which you need to perform the authentication again. More information about this token can be found from the API authentication page
Two-factor authentication
It is not possible to access any endpoints requiring two-factor authentication with an access token acquired using the Client Credentials Grant flow. The use of any such endpoint requires the user to be actively present and is thus limited for API sessions initiated with Authorization Code Grant flow only.
Revoking API Keys
API Keys can be revoked using the Procountor UI. This happens on the API client keys view, which can be accessed through the Basics button in the upper right menu bar at the top of the screen. This opens up a view where it is possible to see and revoke any API keys belonging to the logged in user, or if the user is a company admin, for any user in the company.